Establish Development Environment
Table of contents
The steps in this section should be applied to a development environment, where you want to develop / extend the OCG Data Service or OCG UI on the base of the existing framework.
If you only want to publish and use these two products, you can skip this section
Software Installation
- .Net Core SDK 3.1
- Node.js (including NPM)
- Yarn and Angular CLI
- Git
- If using proxy, follow this link to configure it properly
- Visual Studio Code
- If using proxy, follow this link to configure it properly
- Install the plug-in Settings Sync and follow the steps to configure the synchronisation (user: ocgde-dev, pwd: Oxford2020!)
- Visual Studio 2019
- Add the NuGet source (Tools – Options – NuGet Package Manager – Package Sources): https://oxcoteam.pkgs.visualstudio.com/_packaging/OCG_NuGet_Feed/nuget/v3/index.json
Project Setup
The project setup steps should be only applied on the customer side when extending OCG UI for customer specific requirements. They should not be applied to the development of OCG UI Core or Out-of-Box projects.
They are used to isolate the code developed on customer side but at the same time still be able to pull the latest changes published in new releases.
Clone the OCG UI project
In VS Code press F1 and input Clone to search the clone command and then clone the OCG UI project from DevOps to a local repository (e.g. C:\ocg\dev\repos)
Ignore the message if asked to open the cloned repository (do not open anything)
Clone the UI Customisation project
Practice the same to clone the UI Customisation project from OCG UI DevOps to the same local repository. This is a template project, which could be added to the customer source code management system (DevOps or others) later on
Ignore the message after clone and don’t open any repository
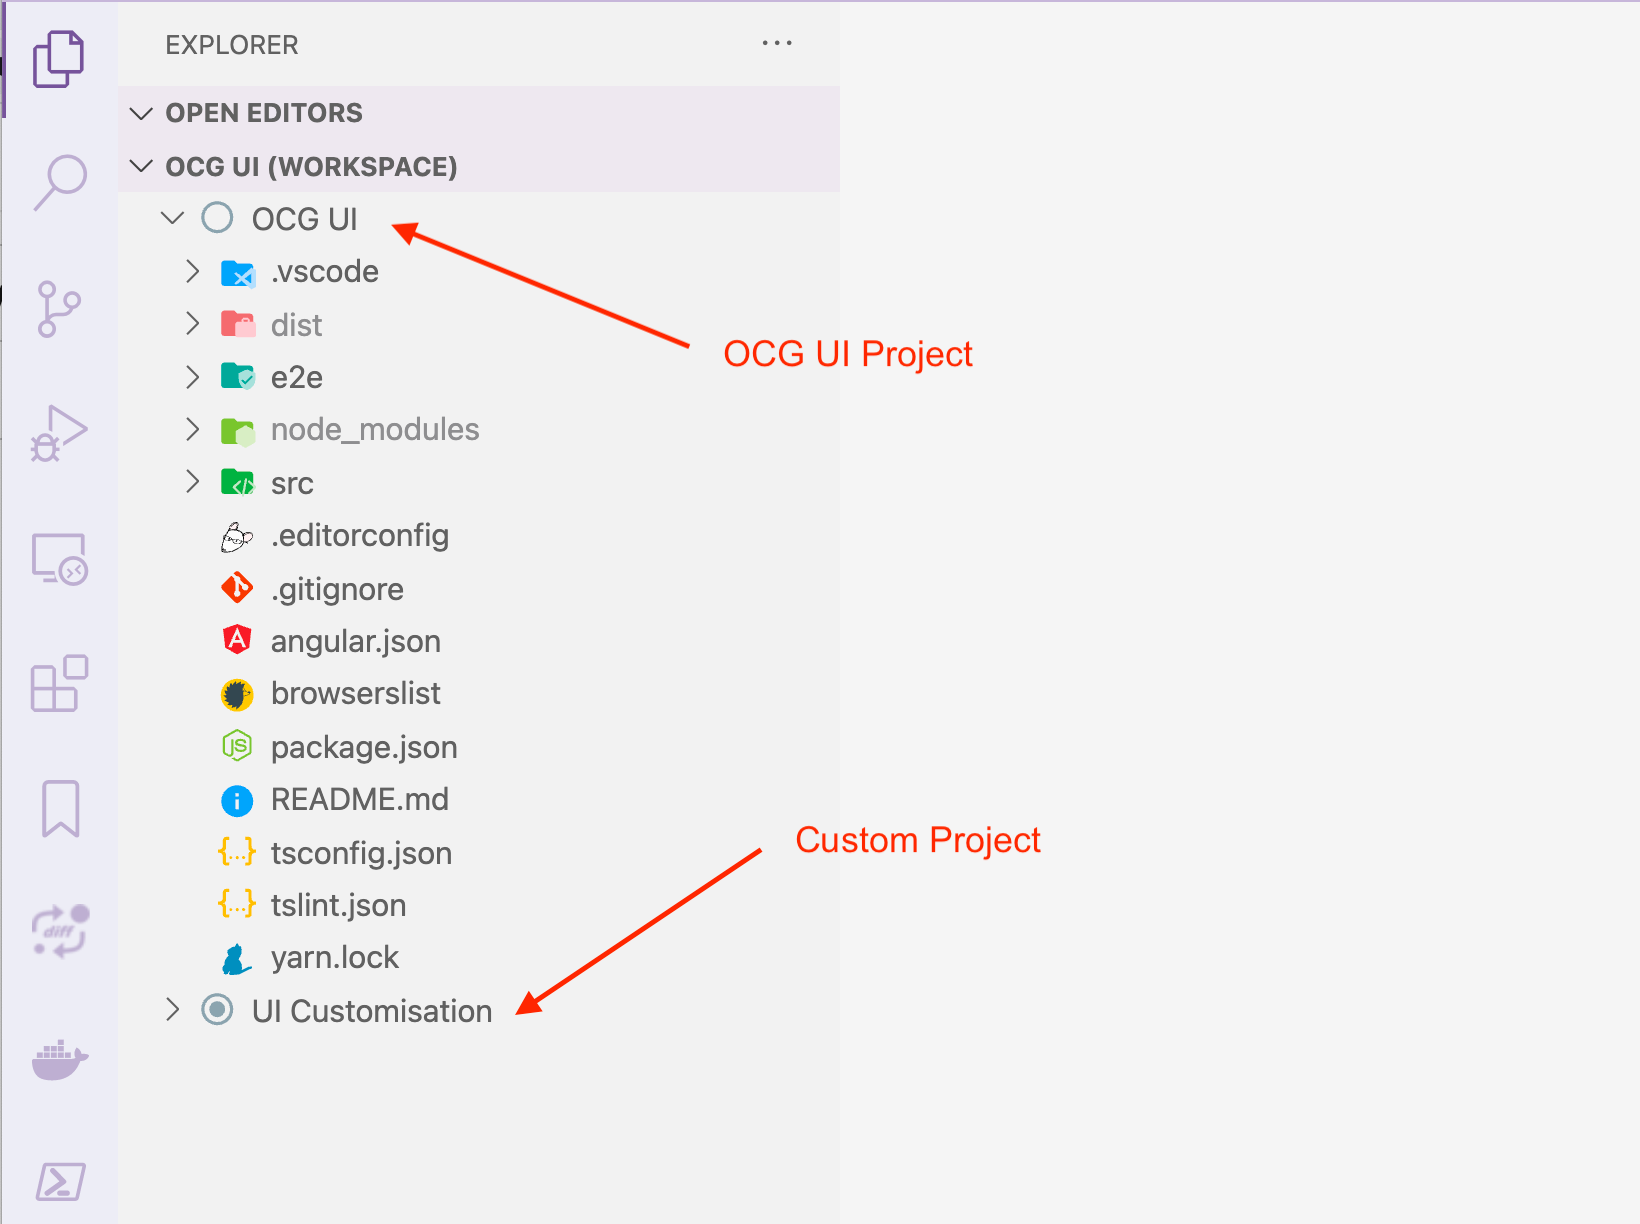
Establish a VS Code workspace including both projects
Two projects are cloned in step 1 and 2,
-
OCG UI project – this is the main project includes core and out-of-box components from OCG. Changes in this project can be committed but should never be published. In case of new releases or hotfixes coming from the OCG side, a “git pull” should be executed to keep the project UpToDate.
-
UI Customisation project – this is the project on the customer side, contains only customer specific code. Changes in this project should be committed and pushed to customer’s source code management system
In VS Code, click File -> Add folder to workspace to add the OCG UI project, do the same for the custom project
Click File -> Save workspace as… to save the workspace setting
|  |
|  | |–|–|
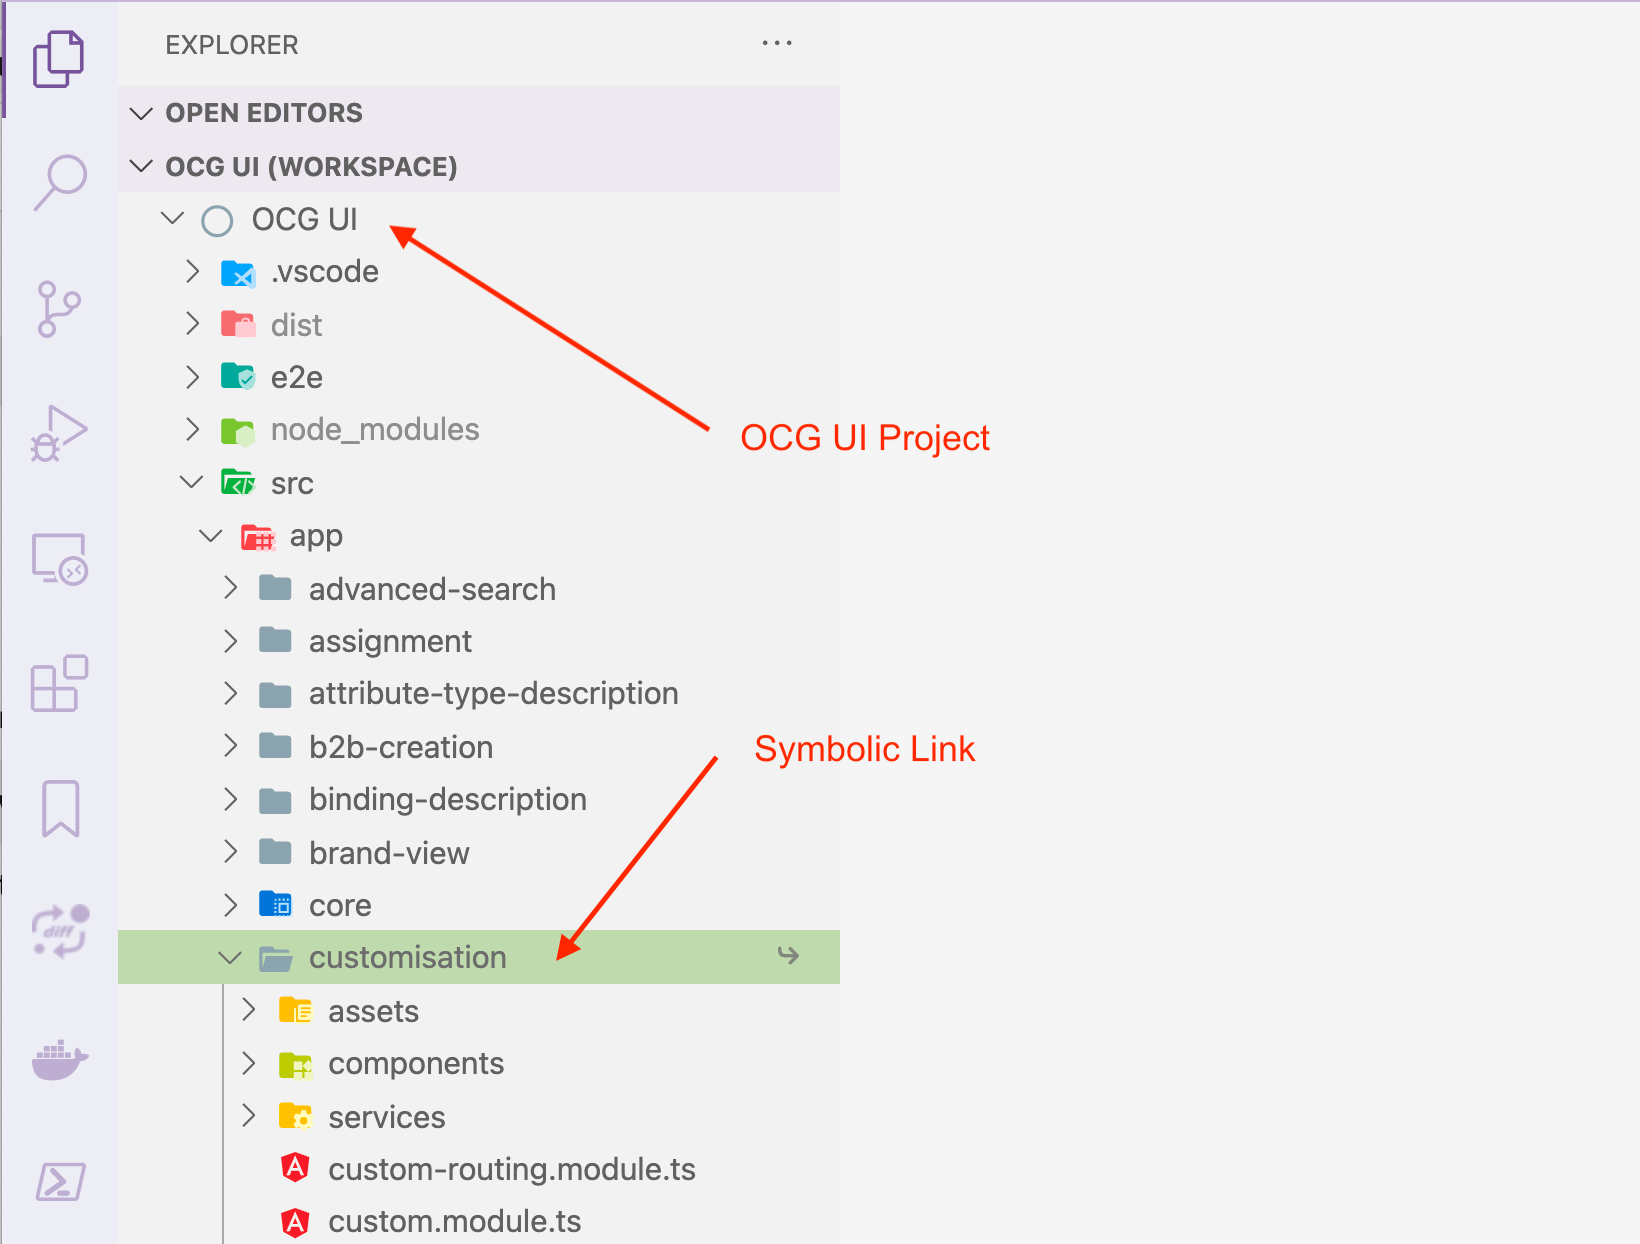
Create a symbolic link in OCG UI project pointing to custom project
The OCG UI project is the main project with all setups needed for developing and testing the angular app (Angular CLI, TypeScript, Prettier, Unit Test, e2e Test etc.). This step will include the custom project into main project using symbolic link
Navigate to src/app in the OCG UI project, right click on app folder and choose “Open in terminal” input the following commands to create a symbolic link, replace
-
cmd
-
mklink /D customisation
The folder name “customisation” is a pre-defined name and should not be changed
Use the following command if under MacOS ln -s /path/to/original /path/to/link
Finish Setup
Setup is finished. Now coding and testing should be done only in the main project (OCG UI). Run “yarn” to download all the packages and restart VS Code.
Pay attention to the following points when coding:
-
Changes made in the main project should be committed but not published to DevOps
-
Changes made in the custom “folder” (actually a symbolic link) will be reflected into the custom project and should be committed and published to DevOps