Wizards
Table of contents
Scenario
In the previous chapters about Search Scopes we defined a new Action Card for Office Equipment and configured the search scopes to show a list of available Office Equipment and related attributes information. Now we want to create a Wizard for our Office Equipment in order to add/create new Object Resources in MIM.
A wizard is defined as a target for the “secondaryAction” of an Action Card and setup via IDABUS® UI Frontend-Capabilities. Our wizard to create new Office Equipment resources could look like this:
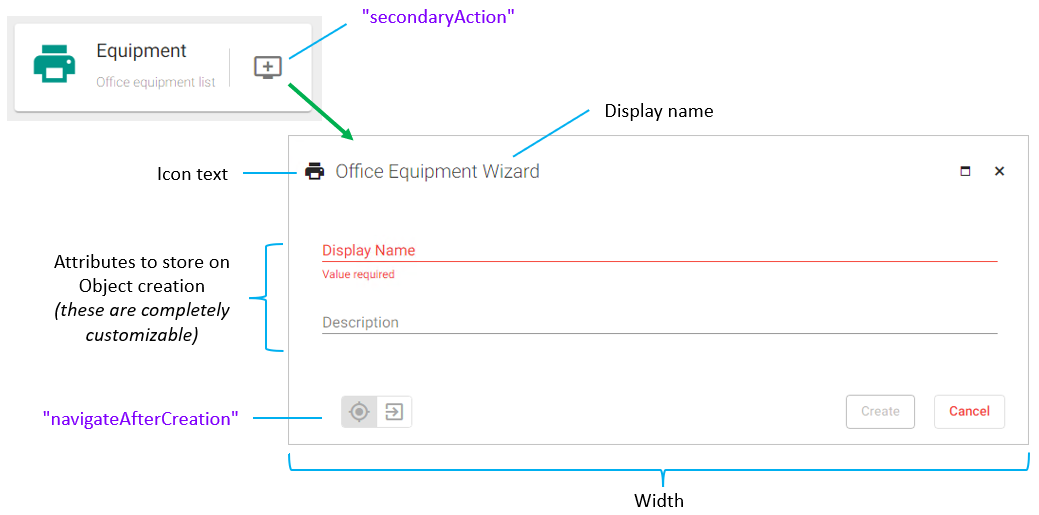
and is displayed when the user clicks on the plus-icon of an Action Card in the All Resources view. This actually attempts to find a wizard within the IDABUS® UI configuration with the name specified by “secondaryAction”.
After all required fields are entered by the user, the Create button is no longer greyed out and the resource can be created in MIM when clicked.
With the “navigateAfterCreation” option the user can control whether or not the IDABUS® UI should navigate to the Detail View of the newly created resource or stay on the current page. The user needs to click the right part of this switch before creating the resource to switch to the Detail View. The (default) left part keeps the IDABUS® UI at the current location. The default can be pre-defined in the customConfig.dev.json file.
Configuration
The wizard needs to be defined at two places:
- within the IDABUS® UI settings page that can be reached by clicking on the gear-icon in the sidebar:
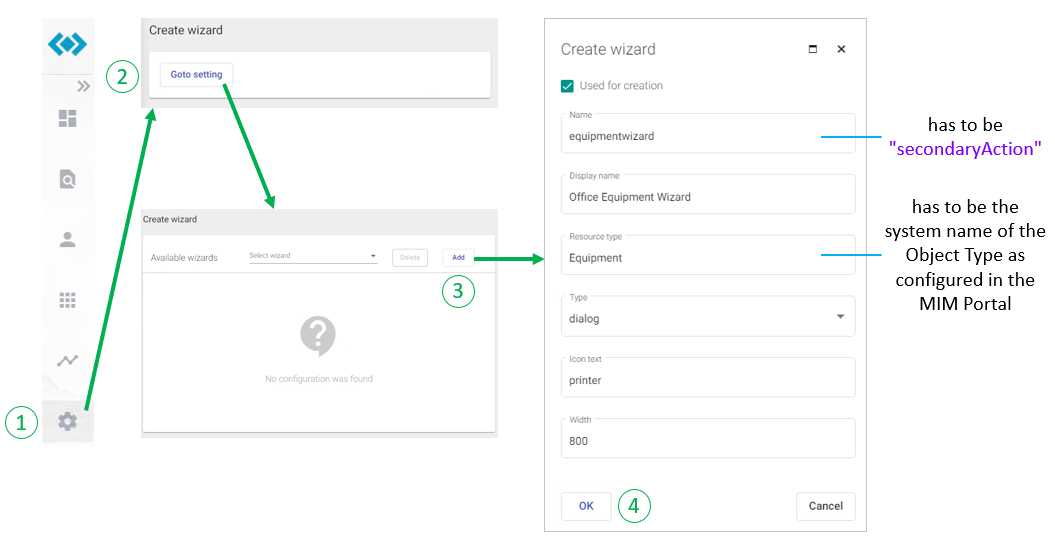
- within the “allResources” config-section for the Equipment Action Card
C:\inetpub\Oxford Computer Group\IDABUS UI\portal\app\customisation\assets\config\customConfig.dev.json
(Create the wizard in the UI first, then create the Equipment Action Card in the config and directly specify the wizards name as secondary action)
After the wizard was created (as shown in the picture above) it can be configured with attributes, dependencies, requirements, conditions, etc. using best suited control to guarentee the data quaility you need. Except for the Resource type all other properties can be changed. The following controls for data types are available:
- Textbox (for Strings)
- Checkbox (for Booleans)
- Select (can be DropDown or RadioButton)
- Date (for Dates and/or Times)
- Identity-Picker (for References)
- Identity-List (for Memberships)
- Button (for custom Angular methods - Advanced Training required!)
- XPath-Editor (for criteria-based Filters)
- Separator (for on-screen separation-purposes)
- Frame (for custom Angular components - Advanced Training required!)
To add attributes to the wizard please follow the steps in the following image and don’t forget to click Save changes when done:
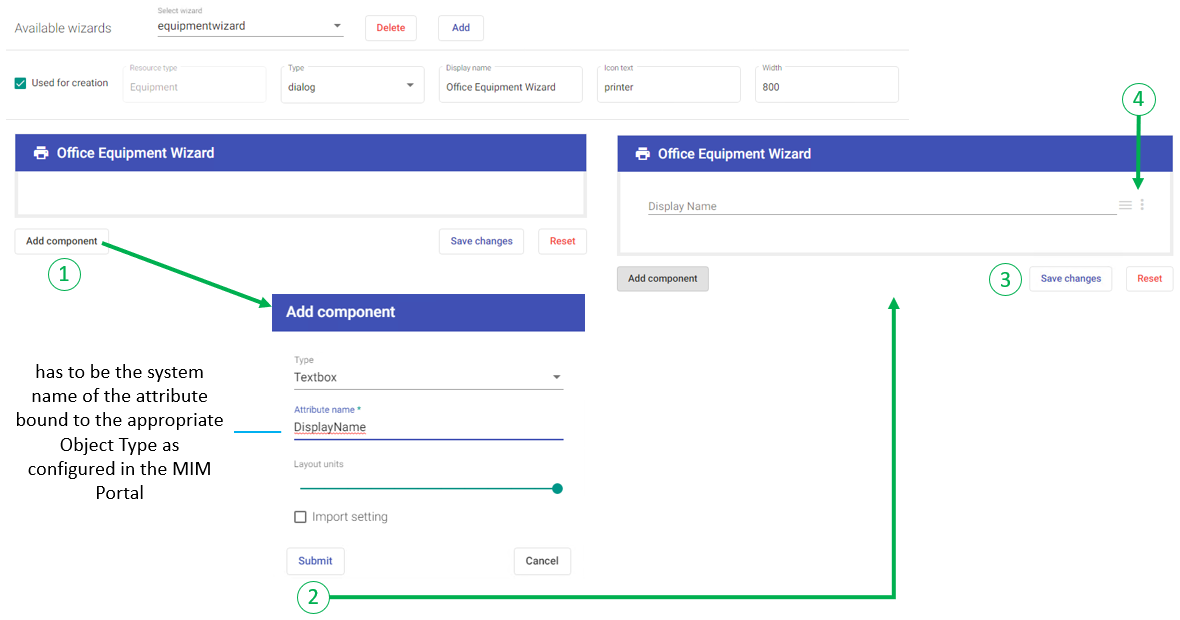
The control for Display Name can be configured or removed with the context menu that appears when clicking on the 3-dots icon at the right end of the control. The control can also be moved/positioned by holding down the mouse button on the 3-bars icon as indicated by step 4.
Again: Do not forget to Save changes!